
Description
These digital calipers are made from hardened stainless steel (won����t rust), can measure up to 6 inches, and switch between metric and English units with one button press. The display reads down to 5 ten thousands of an inch (.0005 or .01mm), accuracy is +-.001 inch (.02mm). They come in a protective plastic case.

How to use:
This brief guide will illustrate how to correctly use this caliper to measure inside and outside diameters, drill bit sizes, hole depths and steps, how to scribe lines during layout work, and also how to make compound measurements.
- First, zero out the caliper: Before each measurement, use your thumb to ensure the face of the measuring surfaces are clean by rubbing off any dust or debris. Close the caliper and check that it reads 0.000, otherwise press the zero button.
The precision of your measurement depends on proper technique and pressure. Use ���������light���� pressure when zeroing and when measuring objects���������-excessive pressure will cause the caliper to deform slightly and skew measurements.


Measuring outside and inside dimensions:
When measuring to a thousandth of an inch, it����s very easy to measure an object at a slight angle. To avoid this, it helps to wiggle the object being measured slightly while applying light closing pressure on the calipers.
Inside dimensions: Here the goal is to find the largest distance. Again, wiggle the calipers slightly while applying pressure.

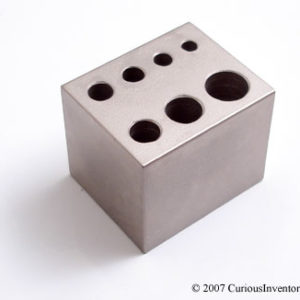
- Measuring drill bit sizes: The shank (the end that goes into the chuck) is not always the same size as the cutting end due to design and also wear. The goal is to measure the largest diameter at the cutting end. To do this, rotate the bit slowly until the reading maximizes (see nearby pic). Note that drill bits always create a slightly over-sized hole, on average .004 larger than the bit size for 1/4���� drills. (ref: Machine Shop Practices, Vol 1, p. 84, by Moltrecht)

Measuring depths and steps: At the small end of the caliper, a rod extends so that depths can be measured. On the other end, there are ‘step faces’ that help to keep the caliper perpendicular to the surfaces being measured (see pic).

-
Scribing layout lines: The tips of the caliper’s jaws can be used to scribe layout lines. First, set the required distance and lock the calipers using the locking screw, then lightly drag one of the tips at an angle. Although the very tips of your calipers will lose their accuracy, most measurements are made on the larger faces of the measuring jaws.

- Compound Measurements: By zeroing the caliper when the jaws are open, it’s possible to skip the subtraction that would normally be required for several types of measurements.
- Distance between centers of equally sized holes: First measure the diameter of one hole and zero the caliper. Now measure the farthest distance between the holes–this is the distance between centers because the caliper is displaying one diameter less than the actual distance.
- Difference: Measure one dimension, zero the caliper, then measure the next. The display will show the difference. This can also be used to determine how much material is left in a blind hole by first measuring the outer dimension, and then measuring the depth.

Reviews
There are no reviews yet.