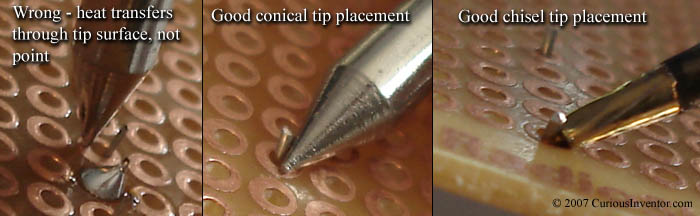
- Heat the joint: Place the iron tip so that it touches both the component lead and pad–the goal is to get as much surface area contact between the iron tip and joint as possible. Almost no heat will travel through the point.
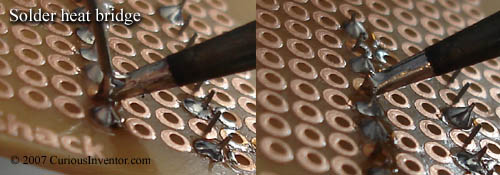
- Make heat bridge: Add a small amount of solder between the tip and the work–heat transfers much faster through the liquid solder than dry surface contact. This is why a tip that won’t “wet” is so difficult to use. Pressing hard should not be necessary. This step may not be necessary if there’s enough solder already on the tip from tinning it after cleaning.
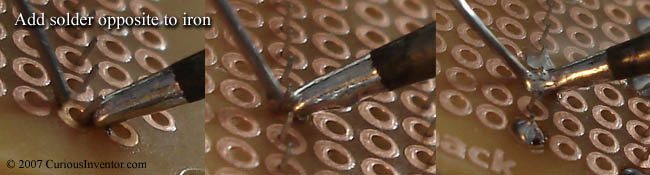
- Apply solder to opposite side: Apply solder to the parts, not the iron. By doing this, you ensure the parts are hot enough for the solder to “wet” and bond with them. Also, solder will run towards the heat source, so applying solder opposite from the iron helps to spread it out and cover the joint.
For larger joints, rather than dumping in all the solder quickly, continuously pulse in small amounts to keep a fresh supply of active flux available.
- Time: The joint should take about 2-5 seconds total time for standard 60/40, 63/37 lead based solder and a non- no-clean flux, and up to 7 seconds for lead-free solder. Lead-free solder just takes longer to “wet” the metal.
In general, the goal is to make the joint as quickly as possible. Longer times can char and damage the board, lift pads, overheat components, burn off and polymerize flux (making it harder to remove), and finally lead to a more brittle joint. Solder doesn’t just freeze on a joint, tin in the solder dissolves and chemically reacts with copper in the connection to form a new bonding material, called an “intermetallic layer”. While this layer is what makes an excellent thermal and electrical bond, it is also extremely brittle; a doubling of its thickness reduces joint tensile strength by half (ref 1). Since this layer grows faster with higher temperatures, joints should be made using the coolest temperature and shortest soldering time possible. This layer is also why re-heating joints has been shown to weaken them. Having said all this, I have to admit that I don’t know just how long is too long for projects that don’t need to operate for 30 years with 100% reliability. After 10 seconds there’s a good chance the flux has been used up.
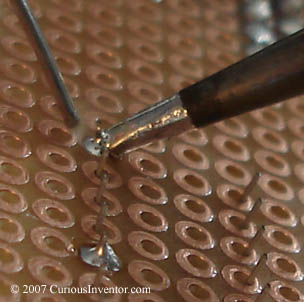
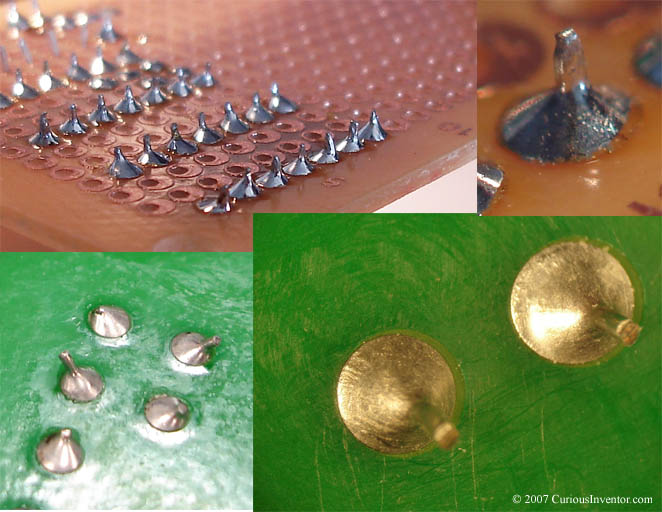
- Remove solder, then iron: Pull the iron out fairly quickly to avoid leaving a solder spike.
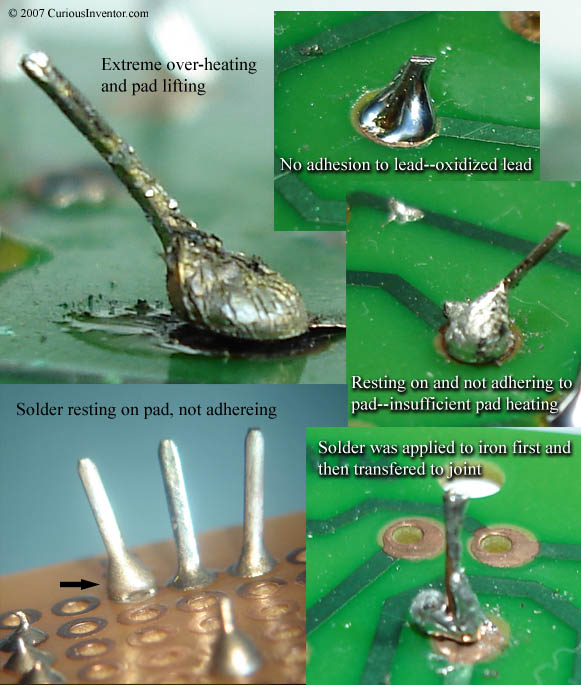
- Good and bad joint gallery:The solder should smoothly ramp to meet surfaces and be shiny in appearance if it’s lead-based. Lead-free solder will have a duller and grainier surface, but will still be a good joint as long as there are no signs of non-wetting. The important thing to look for is any solder that looks like it didn’t cling to a surface, or is just sitting on top or next to a surface.Gallery of joints:
A NASA gallery of every possible joint / board defect you could ever imagine. Here’s another great gallery of defects.
Great comparison pictures between lead-based and lead-free joints. p. 34
Good joints:
Great joints:
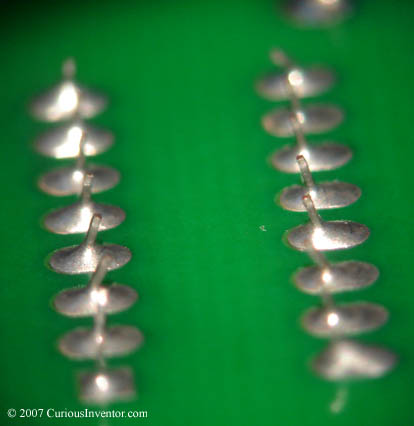
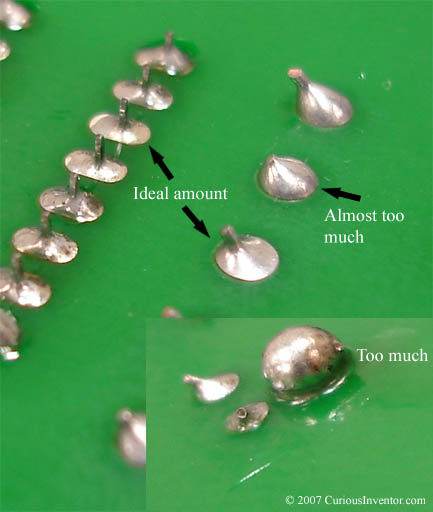
What’s the right amount? A large amount of solder is not needed, just enough to cover the pad and lead without any gaps (actually, only 270° is required by IPC J-STD-001). The measure for too much solder is whether or not you can see the outline of the lead in the solder. This is important because you need to be able to see whether the solder adhered or “clung” to the lead (indicating a true bond), and didn’t just freeze around it. This applies to all types of joints: tinning wires, soldering to connectors, surface mount components… the solder should never completely hide the underlying wires or leads.
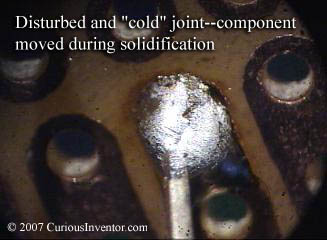
Disturbed joint (bad): If the component moves during solidification, the internal structure of the solder will have fractures, leading to a high resistance or unreliable electrical connection, as well as a fragile mechanical one. The solder also appears dull and grainy–typical signs of a “cold” joint that doesn’t actually bond with the underlying surfaces.
“Cold” joints are often formed when the underlying pad or lead didn’t get hot enough for the solder to wet it.
Awful joints:
Heat and Solder the Joint
Leave a Reply