Description
Typically, starting a tap is the most tedious and error prone part. If tapping by hand, it’s important to visually check the alignment from several different directions while making the first few turns. If you do start the tap off-angle, it can be very hard to correct the course. Alternatively, a tapping block automatically keeps the tap perpendicular to the part surface without any special care or checking required. Our metal working video shows a demo of this towards the end.
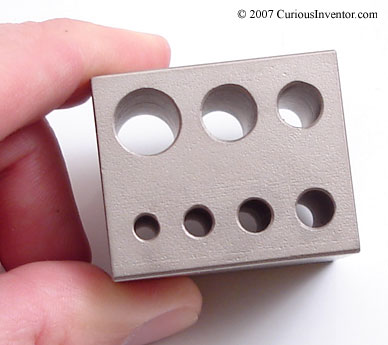
To use, first apply tapping fluid. Then hold the tapping block flush against part and make about 2 full revolutions. After this, reverse the tap to until you feel the chips break, and then continue forward for a quarter turn before again reversing. Continue repeatedly turning forward and then backwards to break the chips.
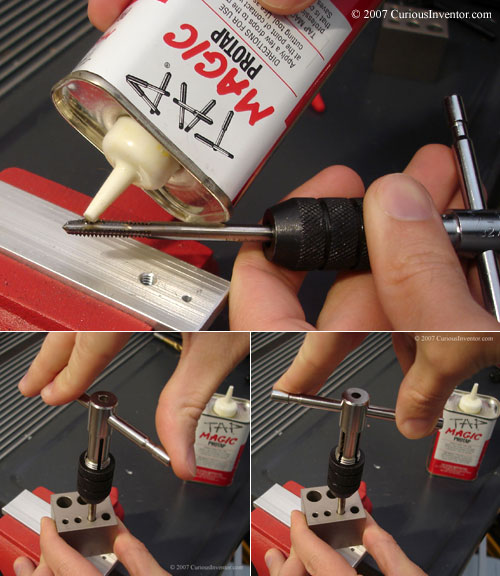
Depending on the metal, tap and cutting fluid, you may not need to reverse the tap at all. Just be aware that the chips being cut can easily clog the tap and cause it to stall and break; a broken tap can be nearly impossible to remove. If you feel a build up of resistance, first try reversing, and if that doesn’t help, try removing the entire tap, cleaning the hole and adding more tapping fluid.
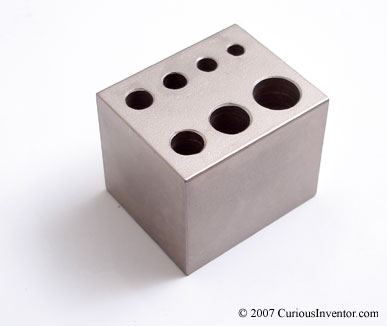
Why buy this tapping block over cheaper aluminum ones? If you’re going to buy a tapping block (instead of making it yourself), you might as well get one that will last forever. This block is made of extremely tough, heat treated 4140 steel. It’s also plated with an even tougher outer layer that will survive getting bumped around in the shop (the plating is used on specialty bullets, as well). In contrast, aluminum will quickly get dinged up and worn by taps. Lastly, this tapping block will also never rust, so there’s no need to keep it coated with oil.
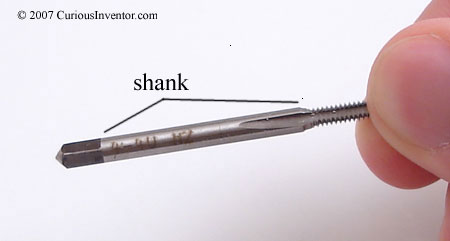
If there are only 7 holes, how can it work with taps smaller than #6? As it turns out, the shank diameter of #0 – #6 taps are all the same, so the shank is actually what guides the smaller taps. Larger taps are first guided by their cutting threads, and then later by their shanks. See the pictures below:
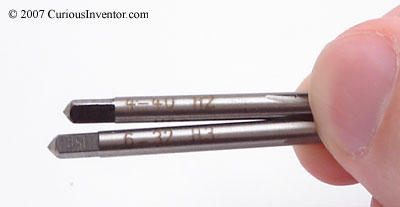
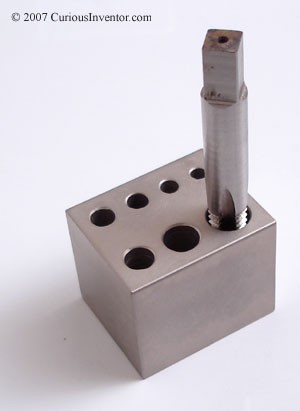
There is a very close fit between the hole and tap, so you may need to rub down embossed markings on some taps, but this is rare–most taps have chemically etched labels that won’t interfere. Also, some cheaper taps don’t comply with ANSI standards, and won’t fit. Here are the ANSI shank sizes in case you’d like to check your taps before purchasing: #6 and lower: .141", #8: .168, #10: .194, #12: .220, 1/4": .255, 5/16": .318, 3/8": .381 (these apply to coarse and fine threads).
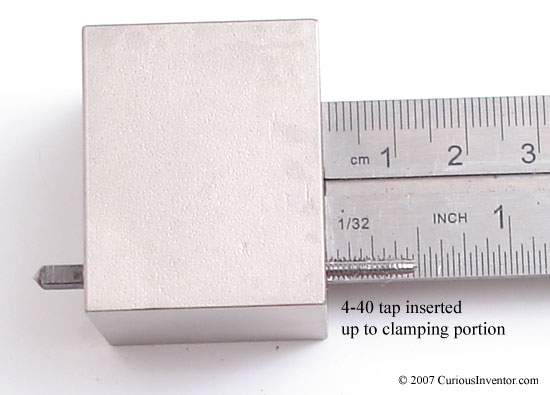
Won’t the tapping wrench hit the top of the block before the tap can get deep enough? As shown below, the #4 tap extends more than enough beyond the block for most standard holes. (If you’re tapping more than 2 diameters deep, chances are the screw will break before the threads strip). If you do need to tap deeper, you can always start the tap with the block, back it out, and then complete the job without the block.
One last note about the appearance: the plating can appear to be uneven, and has a tendency to make cutter marks stand out, but these artifacts are purely cosmetic, and due to the strong adherence of the plating. Every block is carefully checked for squareness.
MADE IN THE U.S.A.

Reviews
There are no reviews yet.